3D Rendering Tutorial – Basic Scene Setup
HOW TO SETUP YOUR 3D SCENE TO MAXIMIZE EFFICIENCY AND WORKFLOW
This guide has been created to specifically show the steps it takes to create an architectural render, or for general 3d environment artists. The tips are transferable regardless of what 3D software you’re using. Take a look at our free 3D software list and try some programs to see which one you enjoy the most. Keep in mind most software requires a considerable learning curve so be patient while learning the new programs.
When starting a new 3D rendering project there are some crucial things to consider about how your 3D modeling software is going to interpret information and how to best optimize your workflow. By going through these steps and creating a default scene with which you can start all new scenes from you are able to save yourself future headaches and cut down on technical mistakes.
HOW TO SET THE SCALE IN YOUR 3D MODELING PROGRAM
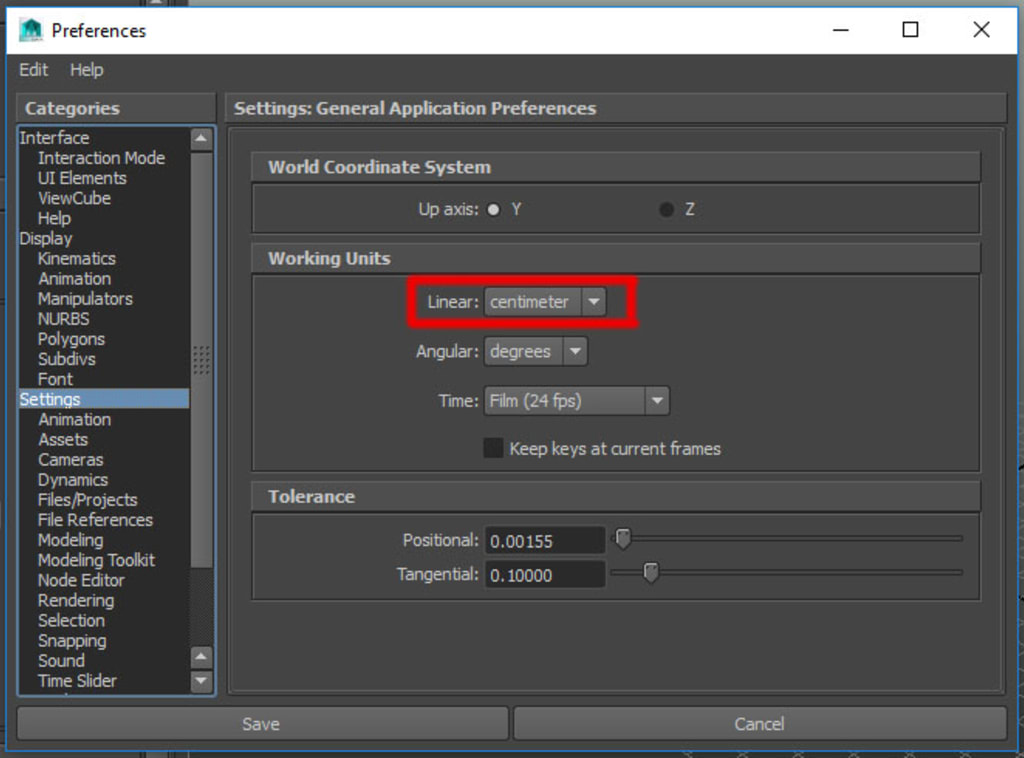
One of the most common mistakes people make when opening up their 3D scene is not setting the correct scale, or simply being unaware of the existence of a scale. This tends to lead to a number of issues as the project progresses and becomes more complex. Personally, I like to set my units to centimeters, this can create some confusion when working with both metric and imperial plans but as long as there is consistency throughout the scene it’s fairly easy to maintain accuracy. Most features in a house are set at predetermined heights at very specific distances from other elements. This is to do with both building codes and convenience. Doors tend to be 6’8 tall and 3’ wide, ceilings tend to be around 8-9 feet tall, counter height tends to be around 36”. Knowing this information comes in really handy when given incomplete plans. All these measurements begin to create the framework for your interior render and for the most part most people are able to piece these elements together quite easily. Knowing that a typical height for a seat is 18” and a table at 30” enables you to scale your 3D assets accordingly into your scene.
HOW TO SET THE PROJECT STRUCTURE
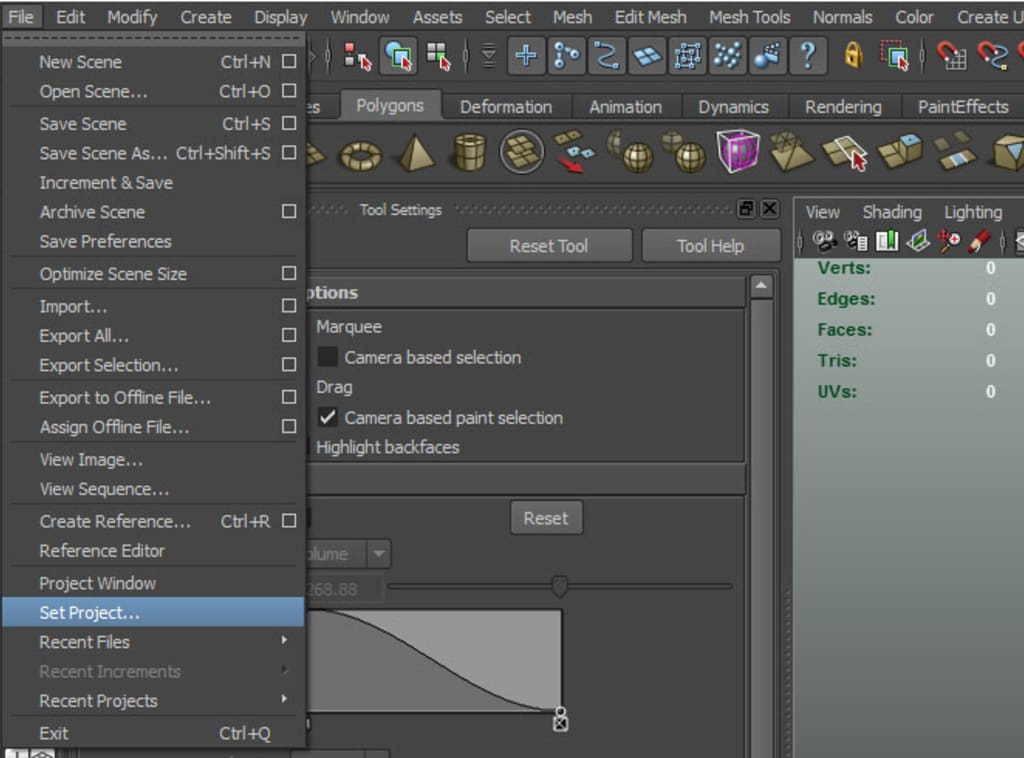
When working on a large number of different projects, creating an organized project structure is key. The project structure in Maya allows you to quickly access your source images, rendered images and scenes in a logical manner rather than having to track down where each element has been saved to. At the start of each project ensure these settings have been correctly updated to follow your own personal project folder structure. When working in the project structure it makes a lot of sense to keep all of your past and present source images for textures in one place. As your texture library grows the number of times you have to actually build a brand new texture starts to drop, having the ability to cycle through previously made textures can save hours on a project. This isn’t something that will happen overnight as textures often need a wide variety of looks for them to work for the scene but even having the ability to make small adjustments can be a huge time saver.
HOW TO CHOOSE WHICH PLUGINS LOAD
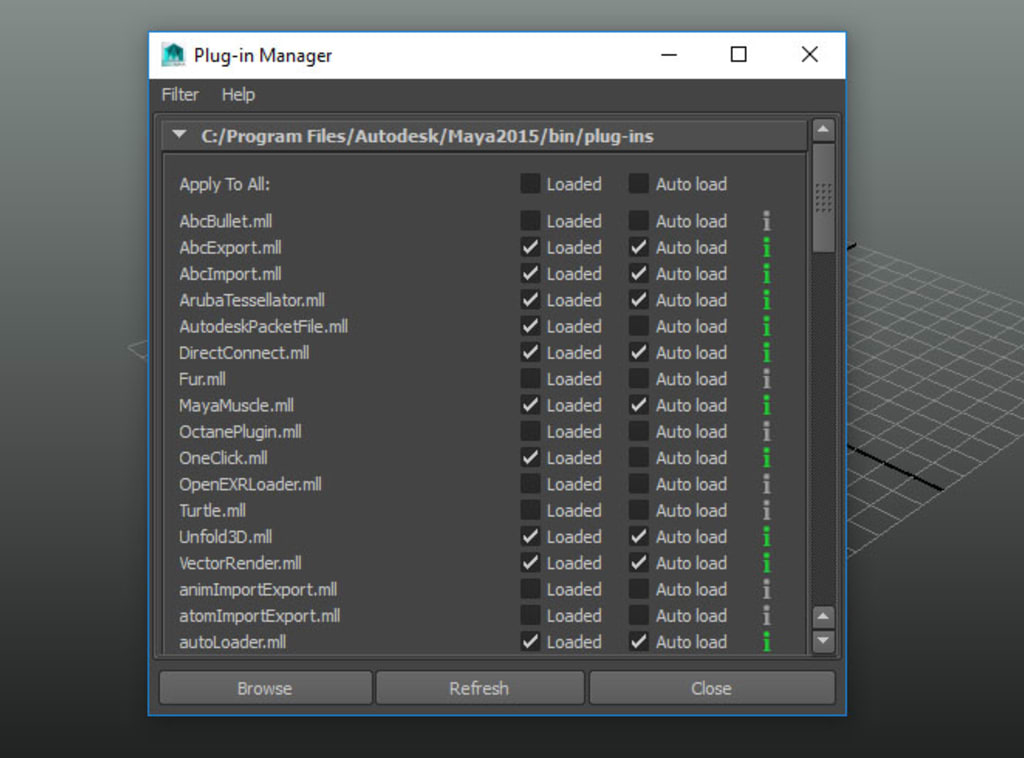
When you create a new scene the software tends to only load the plugins which it has deemed necessary. It’s easiest to turn on all the plugins you frequently use at this point so that everything works seamlessly and is ready to go as you start each new project. In addition, to loading your rendering engine plugin and OBJ functionality we suggest Ninja Dojo as a great free software that comes with a wide variety of tools.
HOW TO SET THE RENDERING ENGINE
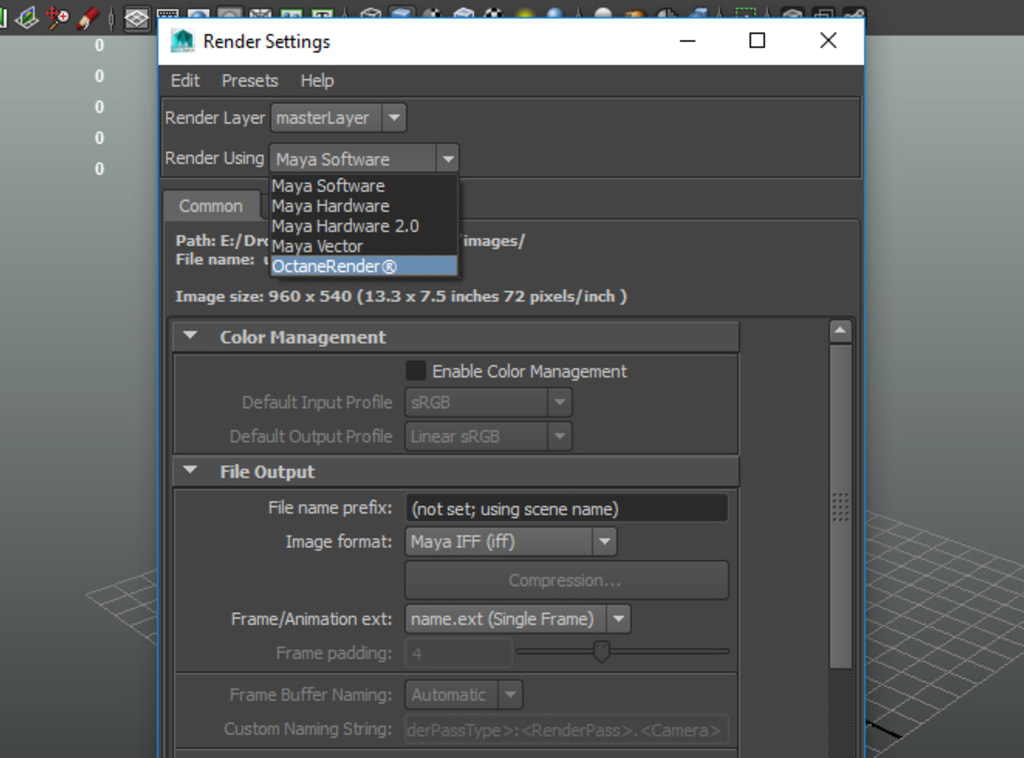
At our 3d rendering company , we tend to use Octane from Otoy . There are some unique settings in Octane which we discuss in detail here. Some of the key things to look out for are that if you’re using graphics card based rendering software you have the correct video cards selected and that you have the correct unit of measurement set in your rendering engine.
HOW TO SET THE IMAGE TYPE AND RESOLUTION
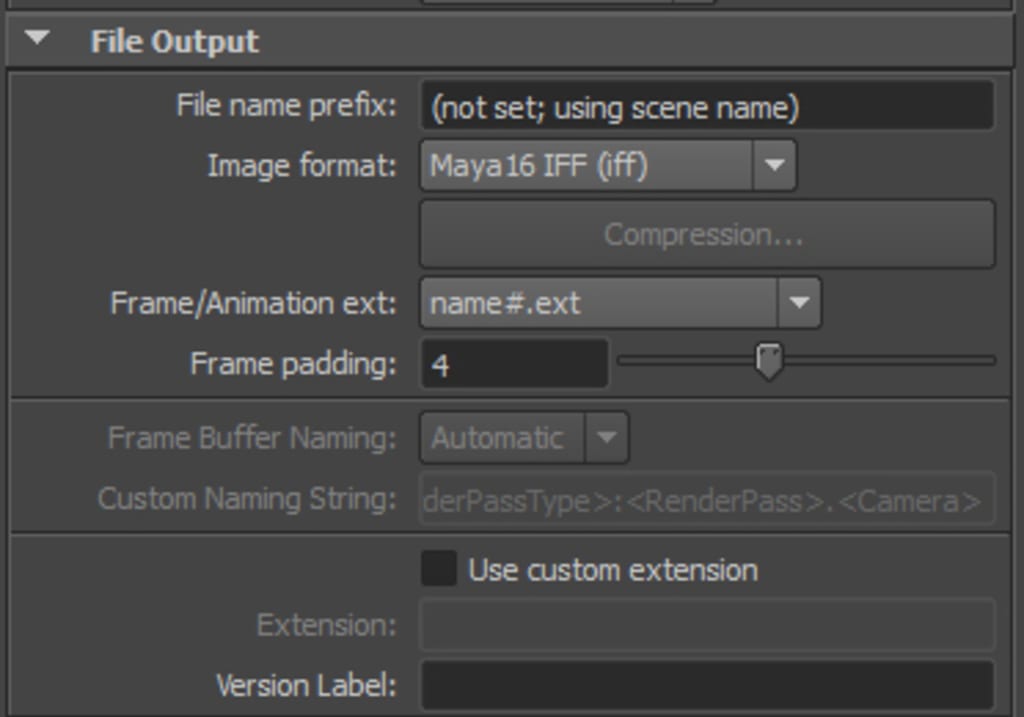
There is nothing more frustrating than leaving a render overnight only to see that your resolution was incorrect or the file is not 16 bit. Although it’s recommended to do tests prior to leaving a render to work it’s magic overnight, making a habit of setting up the scene correctly from the start is the best practice. To learn more about image resolution check out our resource page .
HOW TO MAKE THE 3D PROGRAM WORK THE WAY YOU LIKE IT
This is a little vague, but everyone has their own personal preferences when it comes to operating a 3D program. When you’re setting up your scene for the first time take the time to make everything perfectly optimized for you. Set your hotkeys, plugins, scale, typical lighting rigs etc and then move on to the next, and biggest time-saving step…
SAVE YOUR SCENE AS A TEMPLATE
After taking the time to set your scene exactly how you like it, save the scene as a template for all other projects moving forward. As soon as you begin working on a new project remember to Save-As and create a new project as to not over right your clean, optimized starter scene. (We have 3 versions of the starter scene saved just in case one gets overwritten by accident)
These are just a few of the techniques we employ to try to streamline our architectural rendering process. The harder you work at creating efficient workflows the easier it becomes to increase your project load and project quality consistency.
Related Resources
Top Architectural Rendering Software in 2022

3D Glossary

What is a Shadow Analysis or Shadow Study In Architecture

3D Rendering Style Guide

What you need to get your architectural rendering project started
