
How to texture for Architectural Rendering
3D Texturing Tutorial:
Setting up a simple scene for repeating textures and objects
This tutorial quickly shows you the necessary steps required to produce high-quality textures with a productive workflow.
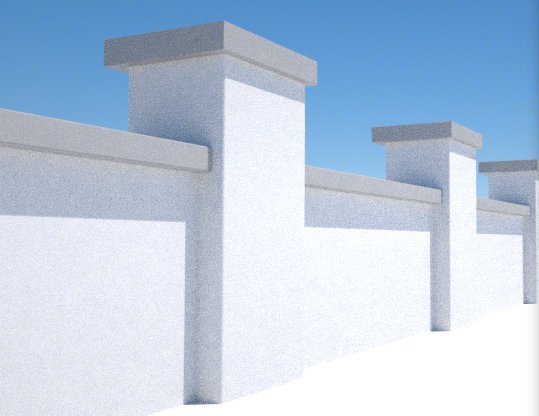
Step 1: Basic Model and shape

As is the case with most 3d projects started from scratch, it’s generally best to start with some basic shapes and a rough camera position so that you can begin to figure out the areas of the scene you need to focus on the most.
Step 2: Unwrapping
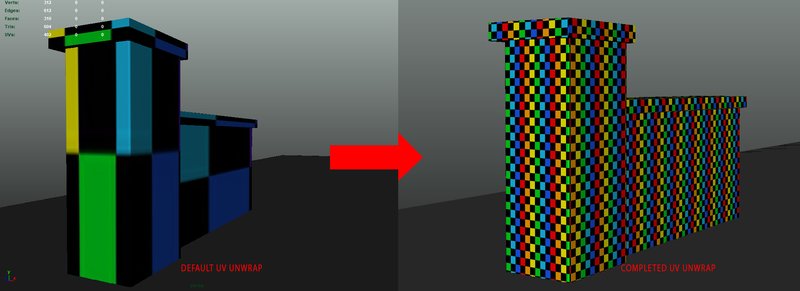
In this scene, I know that I will be duplicating the brick wall numerous times, because of this, I will unwrap the UVs before I perform the duplication.
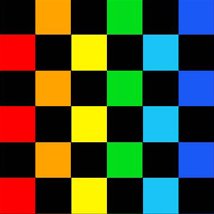
*When unwrapping a scene like this, I like to use a simple color checkered texture to help guide me. This allows me to have a visualization for the UV size and the seams of the UV
Step 3: Duplication
Now that the simple model has been unwrapped I would generally test out the texture I plan on using to make sure it works well for this unwrap. Once I am happy with the results I can move on to the duplication process.
Step 4: Lighting
With the duplication completed, I will now set up the lighting (which we dive into in the next tutorial)
Lighting and texturing go hand in hand when it comes to any 3d Rendering Scene. To achieve a realistic result, you cannot have one without the other.
Step 5: Bump & Normal Maps
In order to understand the way light will bounce off of the object, it is crucial to see how the bump maps or normal maps will impact the look of the object under specific lighting conditions.
Step 6: Specularity Maps
Once I get a general light setup completed, I would then begin to refine the properties of the material. In general, I know bricks will be somewhat dull, but that in mind, maybe the grout will be slightly less specular than the red brick. For this, I would have to create a specularity map in texture from the image.
Step 7: Refining the image
When creating a texture in 3d there is no formula or preset settings to use with each texture. You will need to apply the texture with fairly generic settings and begin refining how the color, bump and specular maps work together under the lighting conditions with frequent render checks.
How to texture for architectural rendering
What this guide covers:
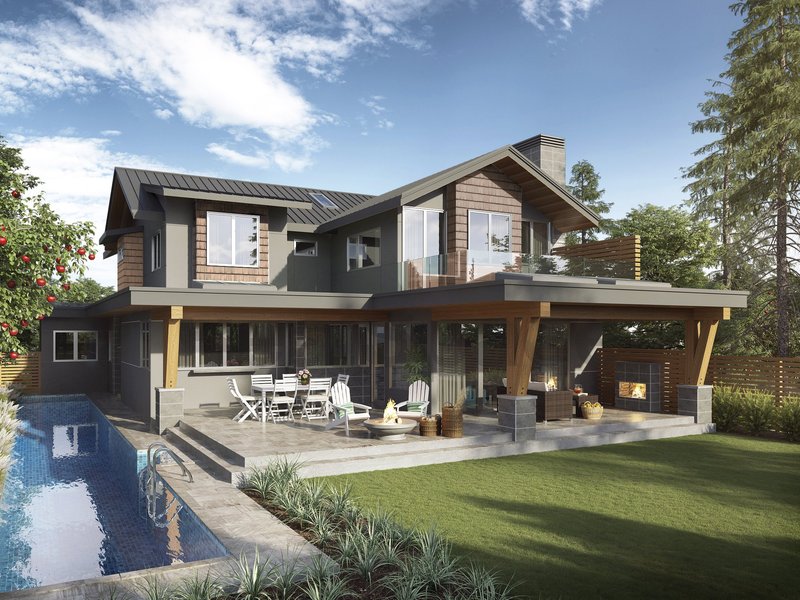
This guide explains the fundamentals of creating realistic, high-quality material from start to finish for architectural rendering.
The intended audience is architects, interior designers, 3d rendering students, and hobbyists looking to improve their knowledge of the architectural rendering process. Our goal is for this to be easily digested information which can be applied to your next project.
In this guide, we create a simple brick wall to convey the fundamentals of UV wrapping best practice, creating seamless textures, applying textures to objects, using bump maps and normal maps, and creating specularity maps.
3D Texturing Basic Terms and Concepts
Before you dive into the tutorials in this guide it may be smart to familiarize yourself with some important texturing concepts
What is a material, as it pertains to 3d architectural rendering?
A material is a fundamental component of 3d rendering , which provides the rendering engineinformation about how the object interacts with light and the camera. Put simply, it is the surface of an object. Every object will usually have a material assigned to it (if not, it generally takes on a standard material property) In the real world, an architect or designer selects materials such as brick, wood, or pain color. In 3D rendering these have to be created from scratch with images and settings or selected from a library.
Different components of a material
WHAT IS A 3D MATERIAL, AS IT PERTAINS TO 3D ARCHITECTURAL RENDERING?
A material is a fundamental component of 3d rendering, which provides the rendering engine information about how the object interacts with light and the camera. Put simply, it is the surface of an object. Every object will usually have a material assigned to it (if not, it generally takes on a standard material property) In the real world, an architect or designer selects materials such as brick, wood, or pain color. In 3D rendering these have to be created from scratch with images and settings or selected from a library.
In architectural rendering we typically see a number of materials which are fairly basic, for example a wood material. This material would not require much of the consideration necessary for a video game or movie, details like grunge, wear, and environmental elements, etc. Instead, it would merely need to be highly accurate to the real world sample.
What is 3d texturing?
Texturing is the technical art of adding a two-dimensional image to a three-dimensional model. Although the predominant feature while texturing an object is the addition of color, features such as the surface's shininess, grittiness and transparency are all under the umbrella of "3D Texturing"
Basic Material Nodes
A material, in general, is comprised of several different components in most 3d software. These attributes include the color of the object, the specularity, the roughness (how expansive the shiny part appears) the index of refraction (how light bends through the object), transparency, and the 3d texture of the object (wood grain, stucco, rough stone surface) simulated with bump, normal and difference/displacement maps.
A material refers to the base level of the object’s visibility nodes, within this base level is a secondary level which provides more specific properties.
Material Types:
Materials are called many different things; generally, they are simply a variation of the math involved in calculating how light reflects or refracts in the rendering software.
For example, a Lambert in Maya is an entirely flat material that contains no specular information. Lamberts are generally computed quicker than their shinier counterparts as reflections and glossiness typically take more computing power than a flat image.
Although Lamberts, or non-shiny materials, are optimal for rendering times, they are not realistic and should be avoided for any objects which are close enough to the camera to require any detail.
Aside from the Lambert’s rendering speed benefits, they often have unique attributes such as light-emitting textures or transparency alpha settings.
The main reflective materials we will be discussing will be Phong, Blinn, Glossy . A common beginner mistake is to use lamberts in place of reflective materials. Many people will look at a painted interior wall and think it is diffuse/not shiny. However, if you look up close you will see that most paint is very glossy. The understanding of subtle reflections and light interactions can really be the difference between a dull flat rendering and photorealism.
Within reflective materials, there are settings such as specularity(could also be called glossiness) this controls how much light is reflected by the object.
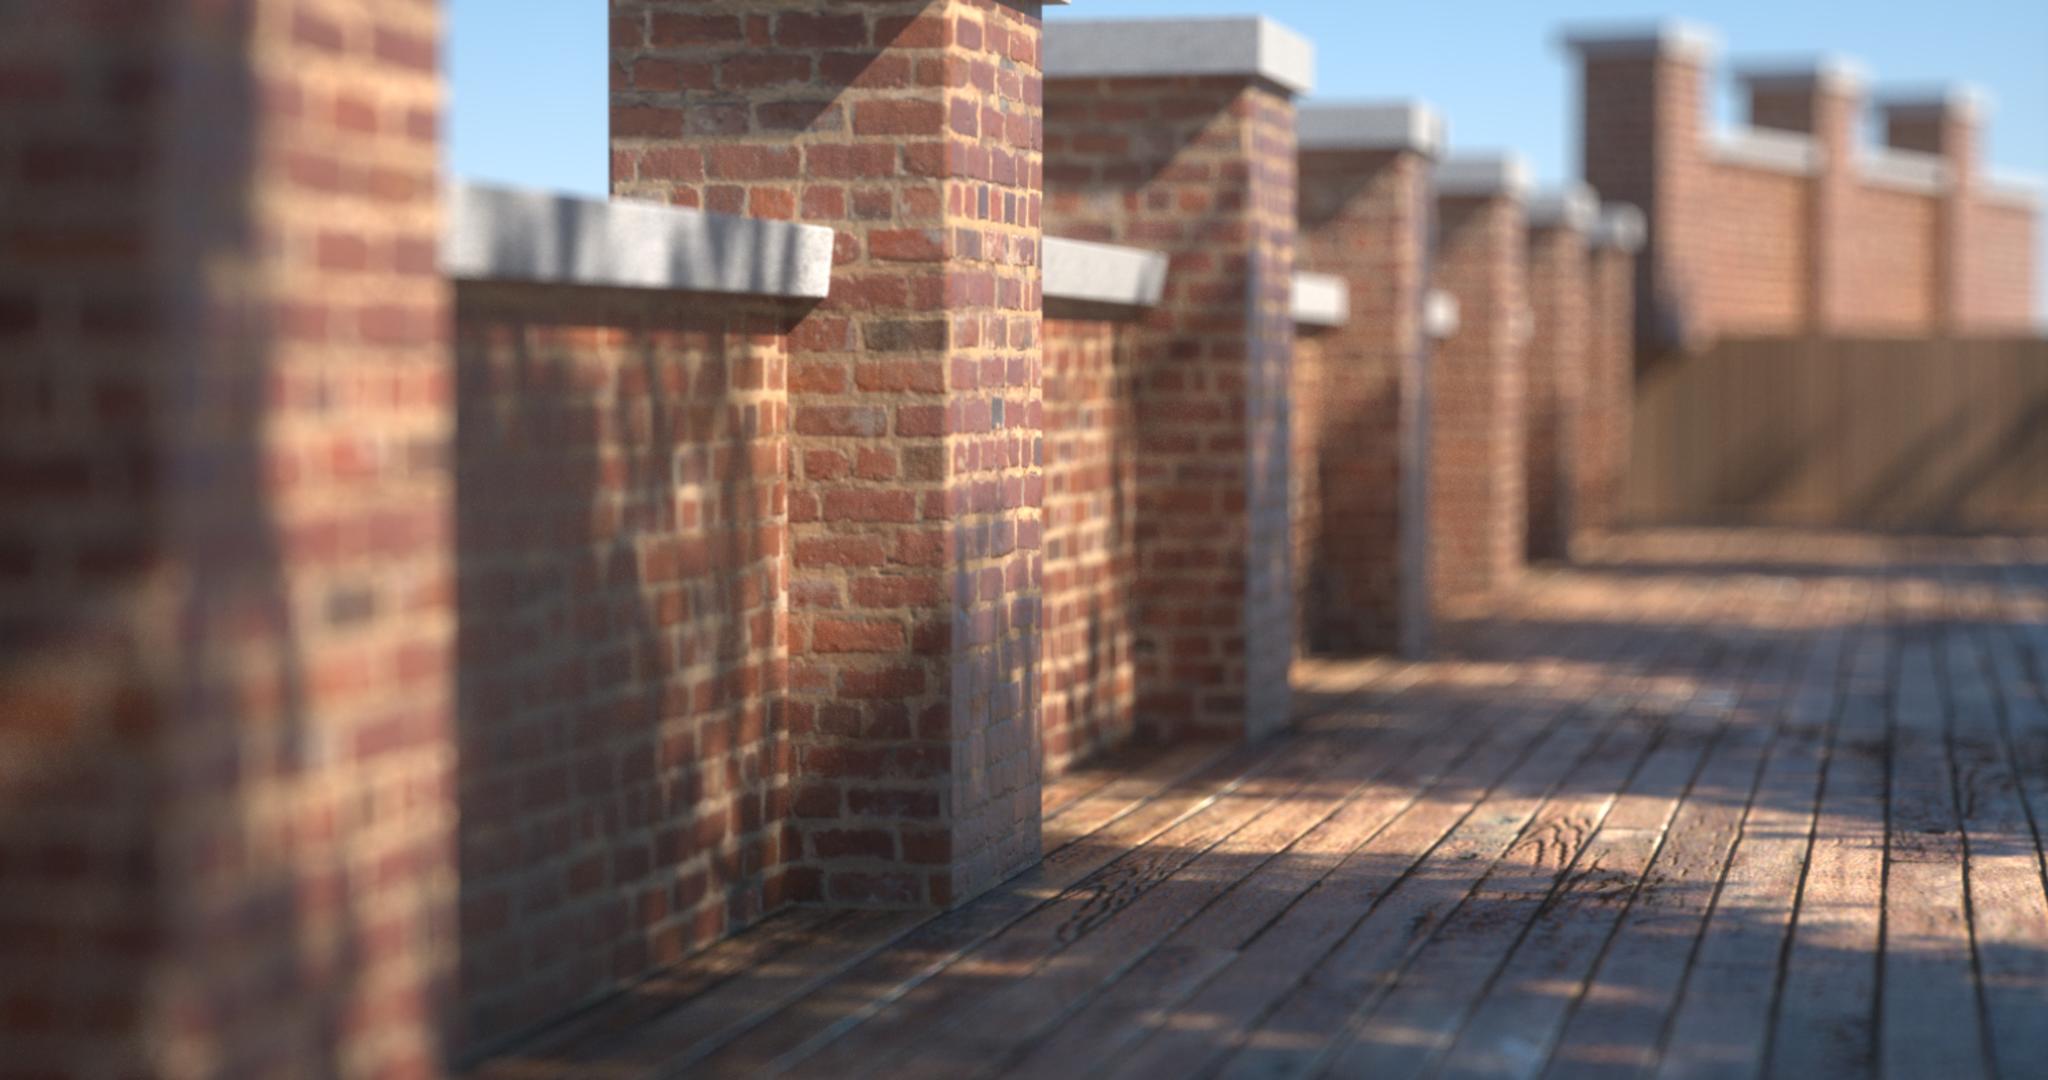
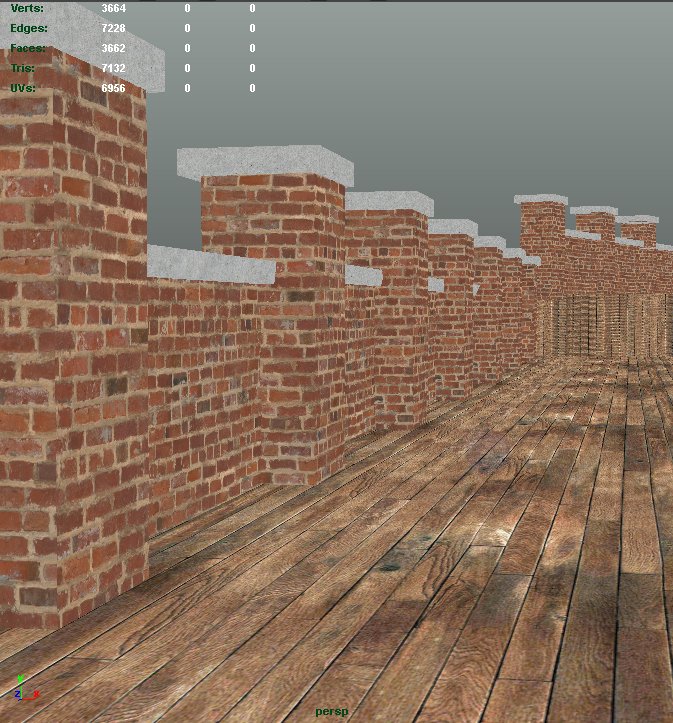
For example, a piece of metal has high glossiness, while brick has low glossiness.
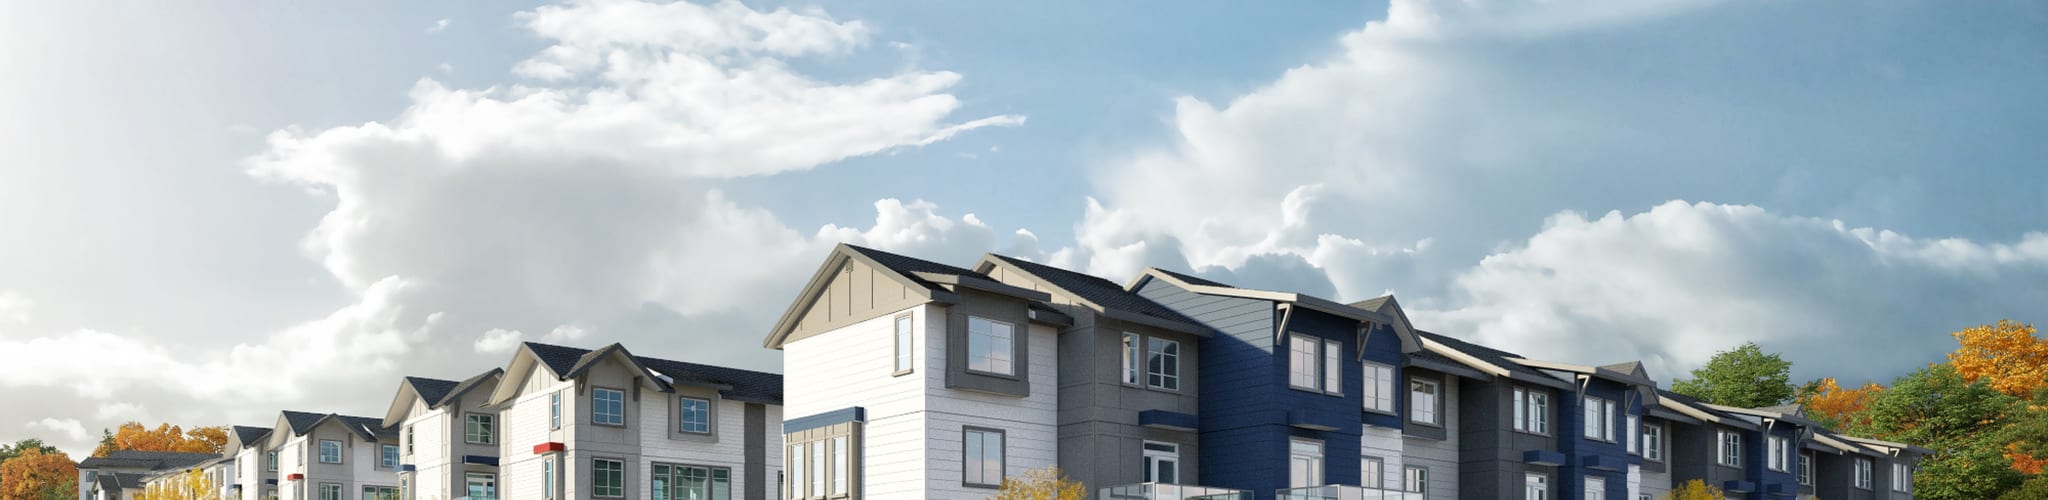
The brick image shown below is using all glossy materials with a variety of different physical properties applied to it.
Translucent materials
These materials are the ones you would use for objects like glass or water. With these materials, there are the same types of properties you would have seen in a blinn or phong, but they also have some unique settings to go along with their transparency settings.
These include “index of refraction” and unusual settings to control the appearance of oiliness on the texture to name a few.
Texture and Color Maps:
Textures are created by having images (or procedurals) plugged into the color node of the material’s attributes. These textures are either specialized images or colors and are the primary visual element of the object. For example, the brick wall in the image below is using a straightforward repeating image texture of bricks. (see below for an example of how to create a seamless repeating image)
Glossiness/ Specularity:
Often when we think about how shiny an object is we consider it to have only one level of glossiness, for example, if something is metallic, it must, therefore, be shiny all across the object. In reality, this is not accurate. Generally, an object like a stainless steel faucet has varying degrees of shininess.
Scratches, scuffs, and rust could have a reduced amount of shininess to them, because of this, we need to convey this information into our 3d software.
The best way to do this is by using what is called a specularity map. This map is typically a black, and white image plugged into the specularity or roughness nodes. In these images, black means not shiny at all, and white means entirely shiny..
OPACITY
Opacity is a fancy way to say the level of transparency and object has. Like most nodes you are able to control the opacity of the material through numerical values or images(from which the software interprets as a numerical value from 0-1)
Bump, Normal, Displacement Maps:
When showing 3d dimensional roughness or bumps on an object, our immediate assumption may be to model this into the 3d mesh. The issue with modelling surface detail is that it's inefficient and will cause slow performance, slow rendering, and a higher likelihood of crashing. It also makes improvements or revisions much more difficult.
There are 3 main “tricks” used by the 3d software to illustrate small amounts of depth to an object while keeping scenes as efficient as possible: bump maps, normal maps, and difference maps.
Bump maps are a black and white image, which look similar to the specular map, the white in the image indicates to the rendering engine a rise in the appearance of the texture of the object, black meaning the opposite. The purpose of bump maps is to add small amounts of grit or bumpiness to an object. Ideal for brick roughness, wood grain, subtle stucco.
Normal maps are the next level in faking the depth of a flat surface; these images are a variety of colors which indicate how light should bend around the bumped out areas of the surface. Normal maps are ideal for things like the grout lines in brick, the cracks in hardwood floor and other small material variances. Although normal maps do an excellent job of faking the added depth straight on, the profile of the object utilizing a normal map remains unchanged, which can be quite obvious from some angles.
Displacement maps are the most intensive variant of depth faking. They act similar to the normal map; however, they also show the depth in profile. This can be very useful in animations.
How do these maps impact render times?
As expected, the bump map is the least taxing while rendering, normal maps are in the middle and displacement maps are the most time-intensive
UV Mapping
UV Mapping is essentially placing the canvas for your textures onto the objects. Although the object is in three dimensions, the texture or image applied to it is always in 2 dimensions. Sometimes it is helpful to think of a piece of clothing such as a sweater or dress. UV mapping and unwrapping are like cutting all the seams and laying out the fabric flat. Depending on the shape of the object the unwrapped surface can look quite different than the object itself. A good example of this is a human face. Luckily, when it comes to architectural rendering, UV mapping is generally fairly straight forward as most surfaces are relatively flat, and we don’t need to worry too much about the complexities of unwrapping tools in your 3d software. (at least in this tutorial)
UVing Tips
- The scale of the UV’s get evenly distributed across the object
- UVs are facing in the same direction
- UV seams are either hidden or aligned to be seamless
- Ensure all UV’s are laid out in a logical way before duplicating (this can save a lot of time)
How to create a repeating seamless texture
When we create textures for architectural renders, for example, the brick texture used below, we often need to show what is known as a seamless repeating texture. This means that if the UV’s overlap, there isn’t a noticeable seam in the middle of an object. The simplest way to do this is:
- Take a photograph of whatever you want your texture to be. Ensure that lighting across the picture is fairly even and that the texture is far enough away to avoid obvious repetition.
- Bring the image into Photoshop
- If the object has uniform patterns in it, you may need to crop in such a way that when it is offset it will line up.
- Go Filter>Other>Offset and set the offset so that you can see where the texture's seams lie
- Use the healing brush tool to mask the visible seams in the texture image
- Once this is blended offset again to confirm there are no distinct endpoints to in the middle of the image
- Save as a new texture